David Hier Render Studio: 3D Modelling & Rendering and Architectural & Product Visualisation


Part 2 - Creating a Seamless Texture
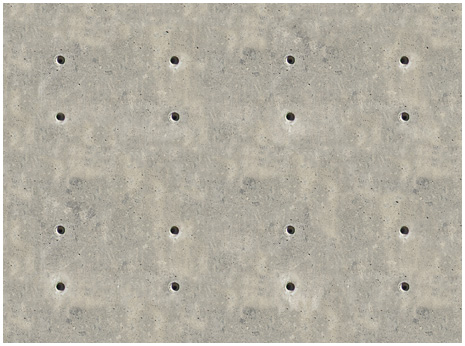
Now that you have corrected the size and spacing of the casting holes, you should have something that looks like this:
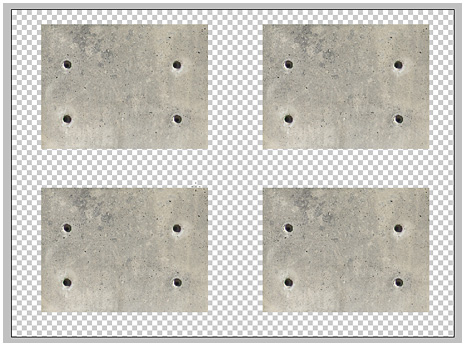
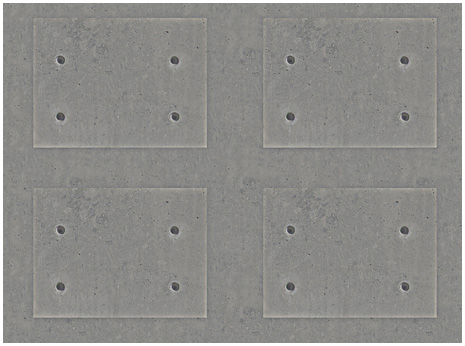
Now re-open your original source image and reduce the image size by 50%. You are now going to use this image to create a tiling pattern that will fill in the gaps between the four separate images pictured above.
Start by using the clone tool (with a soft edged brush) to remove the casting holes. For the next stage you could use software like Imagesynth (discontinued) or Pixplant to create a seamless pattern, but in this instance I want the control offered by using Photoshop's Offset filter (Filter>Other>Offset).
Note: For an in depth explanation of how to use the Offset Filter, I would recommend the following tutorial: methodandcraft.com/videos/creating-tileable-textures
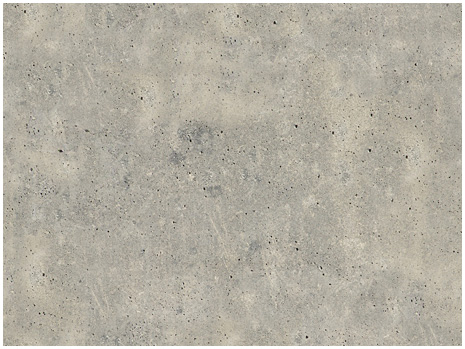
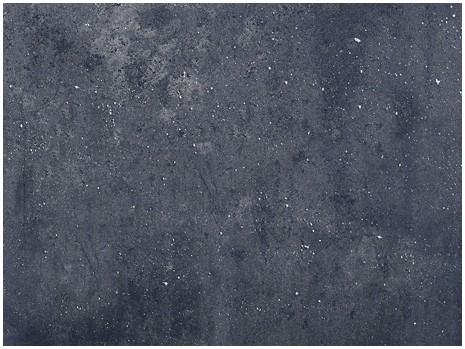
The position of the offset isn't that important, as long as you leave plenty of room to hide the seams (make sure that 'wrap around' is selected). The result will look something like this:

You now need to remove the seams. I find that the least destructive method is to copy sections of the texture to new layers and erase the edges to blend everything together. You can also use the heal, patch or clone tools if you prefer, but I find that they can create too many artifacts.
Tip: Try flipping your copied sections in both directions to avoid obvious repetitions.
Don't worry about going up to the edges as you need to offset the image again once you are done.
Flatten your image (or merge to a new layer) and use the offset filter again. Clone out any remaining seams and any obvious pattern repetitions. Be careful not to get to close to the edges as you could make changes that prevent the texture from being tileable.
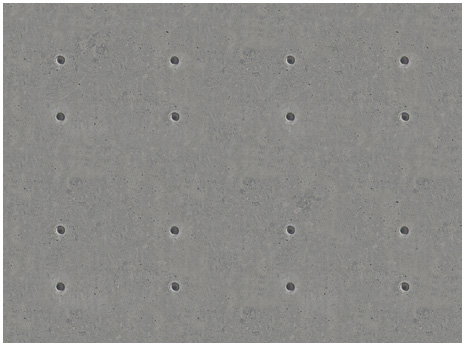
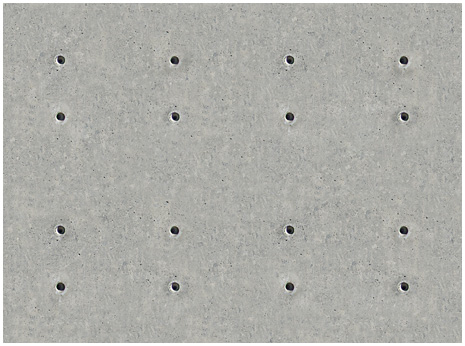
The end result should look similar to this:
Select all and go to Edit>Define Pattern (give the pattern a name). Return to the file used in Part 1 and create a new layer at the bottom of the stack. Select all and Edit>Fill, selecting the pattern you created from the drop-down menu.
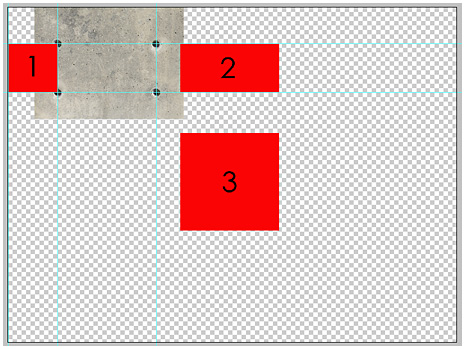
At this point you can erase the edges of the four images to blend them into the background, but the end result might end up looking patchy because of the unevenness in colour and tone (see below for an example).
Tone & Colour Correction
To avoid creating a patchy texture it's a good idea to reduce some of the colour and lighting inconsistencies.
Duplicate the background fill layer and invert the image (Image>Adjustments>Invert). Apply some Gaussian blur and set the layer opacity to around 40%. The result is very grey and dark, but we can bring back some of the contrast and colouration later.
Repeat this process for the layer you created for the four separate concrete textures.
It's now time to begin the process of merging the two layers together. You can dive in with the eraser and blend the edges of the four textures (you can be as drastic or conservative as you want), or use a layer mask if you are concerned about making a mistake and want to preserve the original image.
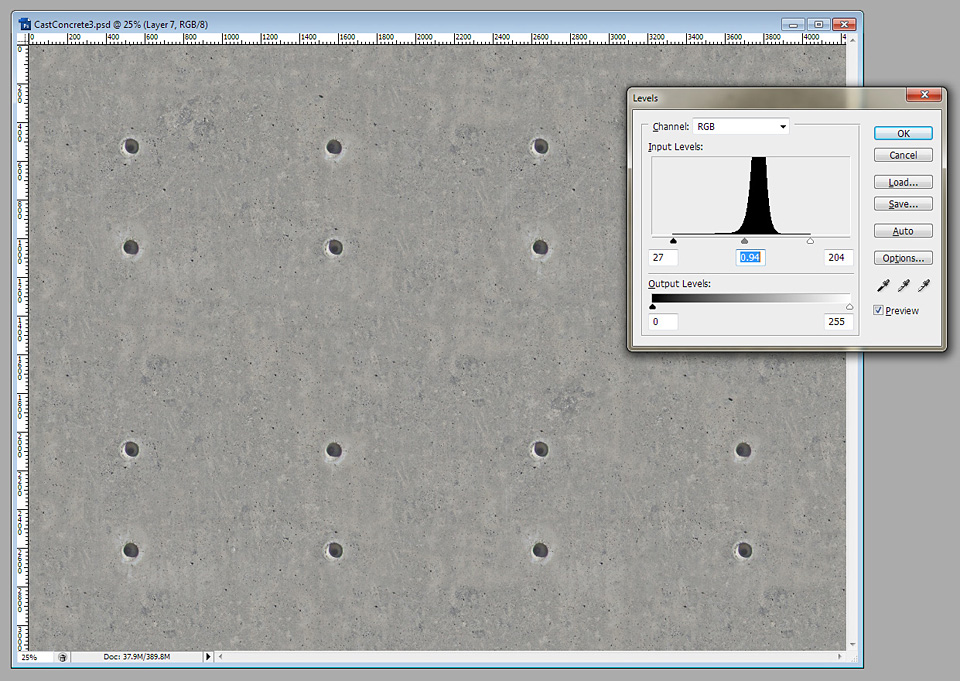
Flatten your layers or merge them to a new layer and bring back some of the contrast using Levels (Ctrl + L). As well as improving the appearance of the texture, this will also help you to spot obvious repeating patterns. You can do further tone-mapping once the final tiled image is ready.
Although the image should now be tileable, there will be areas that show obvious repetition and make the tiling obvious. To make these element more obvious (and easier to remove) use the offset filter again and clone, heal or copy and paste over elements that stand out. Offset sliders must be set to exactly 50% of the file's canvas size.
Tip: Zooming to a magnification of around 5% makes it easier to spot repeating patterns in the texture.
I normally repeat this process a few times to makes sure that I edit out anything that will stick out once applied to a large model surface. The end result might look a bit flat, but it should work better than something with lots of details that makes the tiling very obvious. If necessary repeat the tone correcting technique detailed above. If you do this, you will probably have to bring back the detail again using levels, curves & contrast.
You may notice that the edges of the casting holes in the texture are slightly burnt out. Correct this using the burn tool (soft brush), set to around 10%, on the mid tones & highlights around holes.
Texture Testing
If you want to test how the texture tiles, create a new file with a canvas that is at least double the size of your texture. Use the pattern fill technique used above to fill the new canvas with your texture.
If you can see obvious repetitions, go back to your texture and edit out problem areas. If you work up to the edges of the texture repeat the offset process detailed above.
Once you are happy with the tiling of your texture, you can tone map the final texture until you achieve the results you are looking for.
- « Previous
- 1
- 2
- 3
- 4
- Next »